
ETravelSim customer support
ETravelSim offers multiple support channels to assist users with their questions or issues. For immediate help, you can reach out via WhatsApp or call their support team. For detailed inquiries, sending an email is a reliable option.
Additionally, ETravelSim provides a ticketing system for users to submit specific issues, ensuring your request is directed to the right team for resolution. For common queries and guidance, their website includes helpful resources to explore.
ETravelSim user reviews
ETravelSim has both positive and negative reviews online. I gathered the general user sentiment from the Google Play Store and App Store, as well as review sites like Trustpilot. Here’s an overview of what travelers are saying about their experiences:
What users liked
- Exceptional support and fast delivery. Many users praised the company’s responsive customer service and quick delivery of eSIMs.
- Ease of use. The purchase and installation process was frequently described as simple and straightforward.
- Great for long trips. Travelers planning extended journeys appreciated the convenience and flexibility of ETravelSim’s eSIM options.
What users didn’t like
- Technical issues. Some users reported problems with the eSIM not functioning as expected or failing to pick up a signal.
- Inconsistent service. A few users experienced unreliable or no service in certain areas.
- Transparency concerns. Unlimited plans were criticized for not being truly unlimited, which led some reviewers to believe the provider wasn’t as transparent.
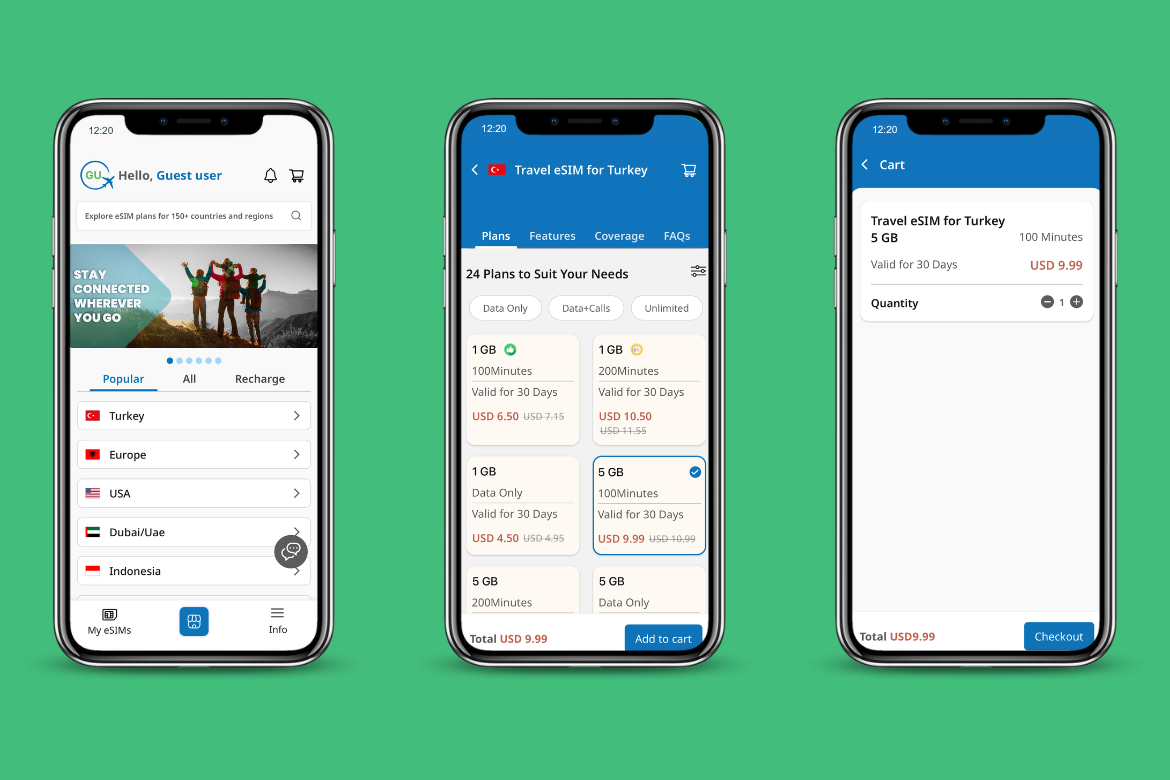
How to use ETravelSim?
Getting started with ETravelSim is quick and straightforward. While the exact steps might vary slightly depending on your device, the process is designed to be simple for both iOS and Android users.
Setting up ETravelSim on iPhone
- Open the “Settings” app and navigate to “Mobile Data.”
- Tap on the “Add eSIM” option.
- Choose the QR code method and scan the QR code you received from ETravelSim via email.
- Follow the prompts on your screen, and your eSIM will be ready to use in no time.
Setting up ETravelSim on Android
- Go to “Settings” and select “Connections.”
- Tap on “SIM Manager” and then choose “Add SIM.”
- Select the option to scan a QR code and scan the one provided by ETravelSim.
- Complete the activation by following the instructions on your device.
ETravelSim makes it easy to stay connected, whether you’re an iPhone or Android user. With just a few steps, you can activate your eSIM and enjoy uninterrupted connectivity on your travels.
Why should you use an eSIM while traveling?
A simple and inexpensive method to keep in touch while on the go is using an eSIM. With this, you won’t have to worry about spending money on data roaming or dealing with the inconvenience of purchasing real SIM cards.
In addition, an eSIM allows you to activate your plan in a flash, have consistent internet connectivity, and move between countries with ease — all without swapping out your SIM card. For those who would rather not bother about connectivity while traveling, it provides a smooth option.
Final thoughts
ETravelSim presents a compelling option for travelers seeking a reliable and convenient way to stay connected. With its broad coverage, competitive pricing, and user-friendly platform, ETravelSim simplifies global connectivity. While their voice call options are limited, their focus on data plans caters to the needs of modern travelers who rely heavily on internet access.